1. Introduction
Back in late 2022, I received an email from NUS about a sponsored Red Hat training and certification. The program consists of two parts: basic system administration and sysadmin automation using Ansible. I really enjoy system administration and playing with the terminal, so I signed up for the program right away. Furthermore, this certification will help me land jobs in the SRE/Infra roles, which I was aiming for.
This post will talk about Red Hat Certified System Administrator Exam (basic sysadmin) which I took recently. I will cover the syllabus and exam format, go through some of the exam scenarios. For each scenario, I will share some tips and tricks which I found useful to solve the scenario. Lastly, I will share my thoughts on the exam experience :D
2. Syllabus and Exam Format
2.1 Syllabus
These are the points that will be tested during RHCSA exam:
Understand and use essential tools
    Access a shell prompt and issue commands with correct syntax
    Use input-output redirection (>, >>, |, 2>, etc.)
    Use grep and regular expressions to analyze text
    Access remote systems using SSH
    Log in and switch users in multiuser targets
    Archive, compress, unpack, and uncompress files using tar, star, gzip, and bzip2
    Create and edit text files
    Create, delete, copy, and move files and directories
    Create hard and soft links
    List, set, and change standard ugo/rwx permissions
    Locate, read, and use system documentation including man, info, and files in /usr/share/doc
Create simple shell scripts
    Conditionally execute code (use of: if, test, [], etc.)
    Use Looping constructs (for, etc.) to process file, command line input
    Process script inputs ($1, $2, etc.)
    Processing output of shell commands within a script
Operate running systems
    Boot, reboot, and shut down a system normally
    Boot systems into different targets manually
    Interrupt the boot process in order to gain access to a system
    Identify CPU/memory intensive processes and kill processes
    Adjust process scheduling
    Manage tuning profiles
    Locate and interpret system log files and journals
    Preserve system journals
    Start, stop, and check the status of network services
    Securely transfer files between systems
Configure local storage
    List, create, delete partitions on MBR and GPT disks
    Create and remove physical volumes
    Assign physical volumes to volume groups
    Create and delete logical volumes
    Configure systems to mount file systems at boot by universally unique ID (UUID) or label
    Add new partitions and logical volumes, and swap to a system non-destructively
Create and configure file systems
    Create, mount, unmount, and use vfat, ext4, and xfs file systems
    Mount and unmount network file systems using NFS
    Configure autofs
    Extend existing logical volumes
    Create and configure set-GID directories for collaboration
    Diagnose and correct file permission problems
Deploy, configure, and maintain systems
    Schedule tasks using at and cron
    Start and stop services and configure services to start automatically at boot
    Configure systems to boot into a specific target automatically
    Configure time service clients
    Install and update software packages from Red Hat Network, a remote repository, or from the local file system
    Modify the system bootloader
Manage basic networking
    Configure IPv4 and IPv6 addresses
    Configure hostname resolution
    Configure network services to start automatically at boot
    Restrict network access using firewall-cmd/firewall
Manage users and groups
    Create, delete, and modify local user accounts
    Change passwords and adjust password aging for local user accounts
    Create, delete, and modify local groups and group memberships
    Configure superuser access
Manage security
    Configure firewall settings using firewall-cmd/firewalld
    Manage default file permissions
    Configure key-based authentication for SSH
    Set enforcing and permissive modes for SELinux
    List and identify SELinux file and process context
    Restore default file contexts
    Manage SELinux port labels
    Use boolean settings to modify system SELinux settings
    Diagnose and address routine SELinux policy violations
Manage containers
    Find and retrieve container images from a remote registry
    Inspect container images
    Perform container management using commands such as podman and skopeo
    Build a container from a Containerfile
    Perform basic container management such as running, starting, stopping, and listing running containers
    Run a service inside a container
    Configure a container to start automatically as a systemd service
    Attach persistent storage to a container
(For more information, go to this page: Red Hat EX200)
2.2 Exam Format
You can take the exam either remotely or physically on Red Hat’s testing center. However, even if you choose to go to the testing center, the actual exam itself will still be done remotely. The only difference is you don’t have to setup the environment (i.e. create a live USB to access the exam environment, prepare an external web camera for proctoring).
You will be given a set of virtual machines for you to configure. For the grading, Red Hat will use automated scripts to check if the configuration done on these machines match with the requirements and give you the appropriate marks. Do note that all configurations must persist across reboots without manual intervention.
There are 2 (two) servers that you need to configure. On each server, there will be a set of tasks that you need to do.
| Server 1 | Server 2 |
|---|---|
| Configure network and package repo | Recover root password |
| Automatically mount NFS using autofs | Configure network and package repo |
| Setup LVM | Run a detached container |
| Create a user account | Find all files owned by administrator |
| … | … |
3. Sample Exam Questions
While I can’t share the actual exam questions here (signed an agreement before I did my exam), I will share some possible tasks/scenarios based on the syllabus.
3.1. Control the Boot Process
3.1.1. Reset the Root Password
Scenario
Suppose we have an old system which we want to use, but we don’t know the root password. How can we reset the root password?
Solution
If we have access to the console and we can edit the boot loader configuration, we can reset the root password of a Linux system.
When we first try to boot the system up, we should be presented with a screen to choose which kernel to be loaded by the bootloader:
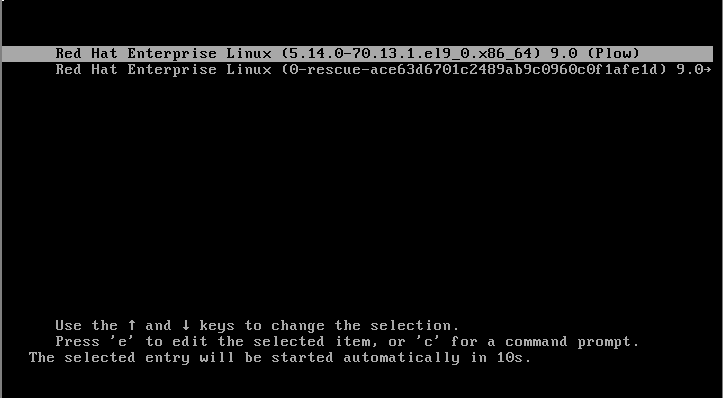
We should choose the rescue kernel (second entry), and then type e to edit the bootloader configuration.
Next, we append “rd.break” on the line that starts with “linux”. After that, we press Ctrl+x to continue the boot process.
We will be prompted to either continue the boot process (press Control-D) or to go into maintenance mode (press Enter). We press “Enter” to get a root shell.
At this point, our root filesystem is mounted as read-only under the /sysroot directory. We remount it as read-write and use it as the root of our system using the following commands:
sh# mount -o rw,remount /sysroot
sh# chroot /sysroot
Then, we can start to set the new root password:
sh# passwd
Finally, we configure the system to automatically perform full SELinux relabeling by running:
sh# touch /.autorelabel
Remarks
For this section, you need to remember the steps by heart. There’s no other way. There is no man pages to be looked at since the system is locked/broken.
3.1.2. File-system Issues at Boot
Scenario
Suppose that you have recovered the root password, but the server hangs before finished booting. How can you fix the issue?
Solution
Similar to the previous scenario, we need to edit the bootloader configuration again. We need to interrupt the bootloader from performing the startup tasks to be able to debug them. This time, we can proceed with the normal kernel, but we still need to press e to edit the bootloader configuration.
Instead of appending “rd.break”, we append systemd.unit=emergency.target" to the line starting with “linux”.
After that, we need to enter the root password to enter the maintenance mode. systemd.unit=emergency.target will stop the boot process a bit later than rd.break, so now our root filesystem is already mounted.
We remount it as read-write:
sh# mount -o rw,remount /
And now we can start troubleshooting. In the exam context, usually it’s file system issue. We try to mount the disks listed in /etc/fstab by doing this:
sh# mount -a
We delete or modify the offending entry on /etc/fstab. Simply use vim or other text editor to modify the fstab file, and the system should work.
sh# vim /etc/fstab
Remarks
Similar to the previous scenario, you need to remember the steps by heart.
3.2. Manage Networking and YUM Repo
Scenario
Suppose we are given the following table containing the expected hostname, IP address, network mask, DNS server, and default gateway for each server. Also, we are given the URL of the software package repository to be used to update the servers.
| Server 1 | Server 2 | ||||||||||||||||||||||||
|---|---|---|---|---|---|---|---|---|---|---|---|---|---|---|---|---|---|---|---|---|---|---|---|---|---|
|
| ||||||||||||||||||||||||
| Package repo: http://repo.practice-lab.com | |||||||||||||||||||||||||
We need to configure our servers to comply with the configuration listed on the table.
3.2.1. Manage Networking
Solution
First, open the console of the first server and check if the current network configuration is correct.
root@serverX# hostnamectl  # check current hostname
root@serverX# ip a         # check the network configuration
If the hostname is not properly set, then we need to change it:
root@serverX# hostnamectl set-hostname servera.practice-lab.com
Similarly, if the network configuration is wrong, we need to change it:
root@servera# nmcli con show              # view the list of connection profiles
root@servera# nmcli con edit CONNECTION1  # edit the active connection
nmcli> set ipv4.addresses 172.25.250.111/24
nmcli> set ipv4.gateway 172.25.250.254
nmcli> set ipv4.dns 172.25.250.254
nmcli> set ipv4.method manual
nmcli> set connection.autoconnect yes
nmcli> save
nmcli> q
Double check the configurations by running:
# check the configuration from the server itself
root@servera# ip a
    *** ensure that the output matches the requirements ***

# check if the ip is correct by ping-ing the server from another host.
# (the DNS server is already pre-configured)
root@test-server# ping servera.practice-lab.com
Repeat the same process for the other server.
Bonus: Suppose we need server A to be able to reference 10.1.2.2 with test-server name. We can add this to /etc/hosts:
root@servera# vim /etc/hosts
10.1.2.2 test-server
Remarks
You don’t need to remember everything about nmcli. You can find some examples of the basic commands (i.e. nmcli con show, nmcli con edit CONNECTION_NAME, etc.) by consulting the man page:
EXAMPLES
    ... more entry ...

       nmcli -t -f RUNNING general
           tells you whether NetworkManager is running or not.

       nmcli -t -f STATE general
           shows the overall status of NetworkManager.

       nmcli connection show
           lists all connections NetworkManager has.

    ... more entry ...
Furthermore, when you are actually creating/editing a connection profile, you can find the attributes by going into interactive mode and type print:
root@servera# nmcli con edit CONNECTION_NAME
nmcli> print
===============================================================================
                     Connection profile details (CONNECTION_NAME)
===============================================================================
connection.id:                          CONNECTION_NAME
connection.uuid:                        6f4d1ca9-2ca2-4cf9-bc3f-ba5ddeb01053
connection.stable-id:                   --
connection.type:                        802-11-wireless
connection.interface-name:              --
connection.autoconnect:                 yes
connection.autoconnect-priority:        0
... more entries ...
Use set to edit the attributes:
nmcli> set ipv4.address 172.20.30.40
nmcli> set connection.autoconect no
I find this method much easier than having to memorize all attributes and do the command in one go like this:
root@servera# nmcli con add con-name con1 ifname eth0 type ethernet \
ipv4.method manual ipv4.dns 172.25.250.254 \
ipv4.addresses 172.25.250.11/24 ipv4.gateway 172.25.250.254
3.2.2. Configure YUM repo
Solution
We need to configure the YUM repo to update and upgrade our servers. To do so, we simply need to create a new file under /etc/yum.repos.d/.
root@servera# vim /etc/yum.repos.d/production.repo

[production]
name=production
baseurl=http://repo.practice-lab.com
enabled=1
gpgcheck=0
Then, we can use dnf update to update the system and dnf install PACKAGE to install new packages.
Remarks
For this one, you should consult the man page of dnf.conf if you forgot the fields you need to specify in the config file. If you don’t want to remember “dnf.conf”, you can always go to man yum or man dnf, and check out the SEE ALSO section.
root@servera# man yum
... more entries ...
SEE ALSO
  dnf.conf(5), DNF Configuration Reference

  dnf-PLUGIN(8) for documentation on DNF plugins.

... more entries ...
But honestly, for the sake of the exam, just remember the fields. Also, in real world, do check the gpg key.
3.3. Manage Users and Groups
Scenario
Suppose we are tasked to perform the following tasks:
- Create a group
sysadminwith a GID of 30000. - Create three user accounts:
alice,bob, andeve. These accounts should have “changeme” (without quotes) as their password, and havesysadmingroup as a supplementary group. - For user
alice:- Allow the password to change after 10 days since the day of last password change.
- Set the password expiration to 30 days since the day of last password change.
- For user
bob:- The user must change his password upon next login
- Must be able to run any commands as a superuser
- Set the default umask as 007
- For user
eve:- The user should not have a login shell.
Solution
These are the steps to achieve the desired configuration:
root@servera# groupadd sysadmin -G 30000
root@servera# for user in {alice,bob,eve}; do useradd $user -G sysadmin; done
root@servera# for user in {alice,bob,eve}; do passwd $user; done

root@servera# chage -m 10 alice
root@servera# chage -M 30 alice

root@servera# chage -d 0 bob
root@servera# vim /etc/sudoers.d/bob
bob ALL=(ALL) ALL

root@servera# vim /home/bob/.bashrc
umask 007

root@servera# vim /etc/passwd
eve:xx:1001:1001::/home/eve:/sbin/nologin  # change the shell to /sbin/nologin
Remarks
For this scenario, you only need to remember the related commands: useradd, groupadd, chage. The man page of these commands will tell you the list of configuration files (e.g. /etc/passwd, /etc/login.defs) that can be used to change the behavior of the program. For the purpose of the exam, remembering which location to edit the sudoers configuration /etc/sudoers.d is also useful.
root@servera# man useradd
root@servera# man groupadd
root@servera# man chage
root@servera# man sudoers
3.4. Control Access to Files
Scenario
Suppose we are tasked to perform the following tasks:
- Create a directory
/workspace, which belongs to useraliceand groupsysadmin - Configure the directory to allow members of the
sysadmingroup to access the directory and create contents in it. All other users should have read and execute permissions on the directory. - Configure the directory such that the
sysadmingroup owns any file or sub-directory that is created in this directory, irrespective of which user created it. - Ensure that users are allowed to delete only files that they own from this directory.
Solution
These are the steps to achieve the desired configuration:
root@servera# mkdir /workspace
root@servera# chown alice:sysadmin /workspace   # change ownership
root@servera# chmod 775 /workspace              # rwx rwx r-x
root@servera# chmod g+s /workspace              # files will be owned by sysadmin
root@servera# chmod o+t /workspace              # user can only delete their own files
Remarks
This scenario is quite standard, but you can always consult the man pages of chmod and chown if you forget how to do things.
3.5. Configure and Secure SSH
Scenario
Suppose we need to perform the following tasks:
- Create a passphrase-less ssh key for user
bobon servera and copy the key over to serverb 2.bobshould be able to login to serverb 2 without entering his password (from servera). - Configure serverb to only accept key-based authentication (disable password login) and disallow root user from logging in remotely.
Solution
We can do it by:
root@servera# ssh-keygen
root@servera# ssh-copy-id bob@serverb

root@serverb# vim /etc/ssh/sshd_config
PubkeyAuthentication yes
PasswordAuthentication no
PermitRootLogin no
root@serverb# systemctl reload sshd
Remarks
If you forget which file to edit, go to man sshd and it will tell you the list of relevant files. If you read carefully, it will also redirect you to man sshd_config. Upon opening /etc/ssh/sshd_config file, the relevant fields are already there (read: you don’t need to remember the fields :D).
3.6. Schedule Recurring Tasks
Scenario
Suppose we are given the following tasks:
- Schedule a recurring job as the
aliceuser that executes the/home/alice/backup-home.shscript hourly between 7 PM and 9 PM every day except on Saturday and Sunday. Download the backup script from http://materials.practice-lab.com/labs/backup-home.sh. - Configure the /run/volatile directory to store temporary files. If the files in this directory are not accessed for more than 30 seconds, then the system automatically deletes them. Set 0700 as the octal permissions for the directory.
Solution
alice@servera$ wget http://materials.practice-lab.com/labs/backup-home.sh
alice@servera$ crontab -e
0 19-21 * * 1-5 /home/alice/backup-home.sh

root@servera# vim /etc/tmpfiles.d/volatile.conf
d /run/volatile 0700 root root 30s
root@servera# systemd-tmpfiles --create /etc/tmpfiles.d/volatile.conf
Remarks
All knowledge required to do this scenario is inside man crontab and man tmpfiles.d. If you don’t even remember the systemd-tmpfiles service, you can always search it by using apropos temporary or man -K temporary.
3.7. Manage Logs
Scenario
Suppose we are given the following tasks:
- Configure
rsyslogsuch that all message withdebugor higher priority will be written to/var/log/debug - Configure the system journal to persist across boots.
- The server had just been relocated to America/Phoenix. Ensure that the logs are accurate by setting the correct time zone and turning on NTP service. Use timeserver.practice-lab.com as the NTP server.
Solution
root@servera# vim /etc/rsyslog.d/authpriv.conf
*.debug /var/log/debug
root@servera# systemctl restart rsyslog


root@servera# mkdir /var/log/journal
root@servera# vim /etc/systemd/journald.conf
[Journal]
Storage=auto
root@servera# systemctl restart systemd-journald

root@servera# timedatectl set-timezone America/Phoenix
root@servera# vim /etc/chrony.conf
server timeserver.practice-lab.com iburst
root@servera# timedatectl set-ntp true
root@servera# systemctl restart chronyd
Remarks
As usual, if you don’t recall the command, use apropos SEARCH_TERM or man -K SEARCH_TERM. Then, go to the relevant manual page and check out the SEE ALSO section if you don’t find what you are looking for.
3.8. Manipulate Files (find, archive, transfer)
Scenario
- Find all files owned by the user
aliceand save them into a file/home/alice/alice.txt - On serverb, synchronize the
/etcdirectory tree from servera to the/configsyncdirectory. - Create a
configfile-backup.tar.gzarchive with the /configsync directory contents. - Find all files owned by the user
aliceand save them into a file/home/alice/alice.txt
Solution
root@servera# find / -user alice > alice.txt
root@serverb# rsync -av root@servera:/etc /configsync
root@serverb# tar czf configfile-backup.tar.gz /configsync
Remarks
This one is pretty standard, you can always refer the manual page if you forget the exact command arguments.
3.9. Tune System Performance
Scenario
Find the recommended tuning profile and tune our system according to that tuning profile.
Solution
root@servera# tuned-adm active                  # show currently active tuning profile
throughput-performance
root@servera# tuned-adm recommend               # get the recommended profile
virtual-guest
root@servera# tuned-adm profile virtual-guest   # set the profile to the recommended profile
Remarks
As usual, apropos and man are your best friend.
3.10. Configure LVM and Swap Space
Scenario
- Suppose you have a logical volume
mylvwhich is part ofmyvgvolume group. The volume is running out of space; extend this volume to 1GiB. Assume that bothmylvandmyvghas a capacity of 512MiB and you have an empty, unpartitioned disk/dev/vdxon your system. - Create a logical volume
lvdata, which is part of the volume groupvgdata. Set the logical volume to be 512MiB in capacity and the volume group to be 2GiB. Use the same/dev/vdxto store the data. Persistently mount this to/extra_storagedirectory. - Create a new swap space of size 512MiB and automatically activate it at boot.
Solution
The general flow for LVM is as follows:
- Prepare the physical block devices (label them if it’s a brand new disk, then partition as necessary)
- Create the physical volume
- Create the volume group
- Create the logical volume
- Create the filesystem
- Edit
/etc/fstab
In the case of LVM extension, check if the underlying volume group has enough space. If it does, you don’t need to do anything to the volume group and can invoke lvextend right away.
# sub-task 1
root@servera# parted /dev/vdx
Using /dev/vdx
(parted) mklabel gpt
(parted) mkpart
Partition name? []? primary
File system type? [ext2]? XFS
Start? 2048s
End? 1GiB
(parted) print
** You should see one partition here **
(parted) set 1 lvm on
(parted) quit
root@servera# pvcreate /dev/vdx1
root@servera# vgextend myvg /dev/vdx1
root@servera# lvextend -L 1G /dev/myvg/mylv
root@servera# resize2fs /dev/myvg/mylv

# sub-task 2
root@servera# parted /dev/vdx
Using /dev/vdx
(parted) print
** You should see one partition from before. Take note of the END location **
(parted) mkpart
Partition name? []? secondary
File system type? [ext2]? XFS
Start? 1GiB # END of /dev/vdx1
End? 3GiB
(parted) print
** You should see two partitions here **
(parted) set 2 lvm on
(parted) quit
root@servera# pvcreate /dev/vdx2
root@servera# vgcreate vgdata /dev/vdx2
root@servera# lvcreate -n lvdata -L 512M vgdata
root@servera# mkfs.xfs /dev/vgdata/lvdata
root@servera# mkdir /extra_storage
root@servera# vim /etc/fstab
/dev/vgdata/lvdata /extra_storage xfs defaults 0 0
To create swap space, the flow is quite similar:
- Prepare the physical block devices (label them if it’s a brand new disk, then partition as necessary)
- Initialize as swap space
- Edit
/etc/fstab
# sub-task 3
root@servera# parted /dev/vdx
Using /dev/vdx
(parted) print
** You should see two partitions from before. Take note of the END location **
(parted) mkpart
Partition name? []? secondary
File system type? [ext2]? linux-swap
Start? 3GiB # END of /dev/vdx2
End? 3.5GiB
(parted) print
** You should see three partitions here **
(parted) set 3 swap on
(parted) quit
root@servera# mkswap /dev/vdx3
root@servera# swapon -a
root@servera# lsblk -fs /dev/vdx3
UUID=...  # take note of the UUID, copy to /etc/fstab
root@servera# vim /etc/fstab
UUID=... swap swap defaults 0 0
Remarks
Similar to nmcli, I personally prefer to use the interactive mode of parted so that I don’t have to remember the fields/parameter for each command. When configuring the storage stack, be careful with the units (MB vs MiB, GB vs GiB) since Red Hat uses automated scripts to validate the size. While there is a range of acceptable value, (e.g. when they ask for 700MiB, they will accept anything from 600MiB - 800MiB, something like that) you should always be careful with the units.
For each LVM-related command (pvcreate, vgcreate, lvcreate, vgextend, lvextend), you can find the example in the manual page. You only need to remember the hierarchy of the storage stack (physical block devices > physical volume > volume group > logical volume) and you should be good to go.
To grow an XFS filesystem, you can also use xfs_growfs. However, resize2fs is more flexible and works with numerous different file systems.
3.11. Run a Web Server on Non-standard Port and Directory
Scenario
- The
httpdservice on the server is not working. The webserver is serving the files from the/home/devs/webdirectory on port 9999. Debug and fix the issue. - Ensure that the web server is also accessible from different hosts.
Solution
If we were to run a web server from non-standard port and directory, we need to set the appropriate SELinux label to the port and directory. We can try to restart the webserver and check the logs to verify that this is a SELinux misconfiguration issue.
root@servera# systemctl restart httpd
Job for httpd.service failed because the control process exited with error code. See "systemctl status httpd.service" and "journalctl -xeu httpd.service" for details.
root@servera# less /var/log/messages
... more entries ...
May 20 07:50:17 servera settroubleshoot[2179]: SELinux is preventing /usr/sbin/httpd from name_bind access to the tcp_socket port 9988. For complete SELinux messages run: sealert -l ...
May 20 07:50:17 servera settroubleshoot[2179]: SELinux is preventing /usr/sbin/httpd from name_bind access to the tcp_socket port 9988. Plugin bind_ports (99.5 confidence) suggests *** If you want to allow /usr/sbin/httpd to bind network port 998 Then you need to modify the port type. Do semanage port -a -t PORT_TYPE -p tcp 9988...
We can see that SELinux is preventing httpd from opening the port. We relabel the port with the appropriate label:
root@servera# semanage port -a -t http_port_t -p tcp 9988
Then, we restart our server again. After that, we test if we can access the web page:
root@servera# curl localhost:9988
<html><head>
<title>403 Forbidden</title>
</head><body>
<h1>Forbidden</h1>
<p>You don't have permission to access this resource.</p>
</body></html>
Whoops, our access is denied. Again, we consult the logs to gain additional information:
root@servera# less /var/log/messages
May 20 07:51:17 servera settroubleshoot[2479]: SELinux is preventing /usr/sbin/httpd from getattr access on the file /home/devs/web/index.html. For complete SELinux messages run: sealert -l ...
May 20 07:51:17 servera settroubleshoot[2479]: SELinux is preventing /usr/sbin/httpd from getattr access on the file /home/devs/web/index.html. Plugin catchall_labels (83.8 confidence) suggests *** If you want to allow httpd to have getattr access on the index.html file Then you need to change the label on /home/devs/web/index.html. Do semanage fcontext -a -t FILE_TYPE '/home/devs/web/index.html' ...
Indeed it is another SELinux problem. We fix the issue by invoking:
root@servera# semanage fcontext -a -t httpd_sys_content_t "/home/devs/web(/.*)?"
root@servera# restorecon -R -v /home/devs/web
Now, we can access the web page from our local server
root@servera# curl localhost:9988
The page is working!
However, if we try to access the web page from another host,
user@serverb$ curl servera:9988
curl: (7) Failed to connect to servera port 9988: No route to host
We need to configure the firewall to allow connection to go in from port 9988:
root@servera# firewall-cmd --add-port=9988/tcp --permanent
root@servera# firewall-cmd --reload
Now, we are good to go
user@serverb$ curl servera:9988
The page is working!
Remarks
SELinux-related commands are quite well documented. You can easily find and copy-paste the example from the EXAMPLE section of the man page.
root@servera# man semanage fcontext
... more entries ...
EXAMPLE

       remember to run restorecon after you set the file context
       Add file-context for everything under /web
       # semanage fcontext -a -t httpd_sys_content_t "/web(/.*)?"
       # restorecon -R -v /web

       Substitute /home1 with /home when setting file context
       # semanage fcontext -a -e /home /home1
       # restorecon -R -v /home1

       For home directories under top level directory, for example /disk6/home,
       execute the following commands.
       # semanage fcontext -a -t home_root_t "/disk6"
       # semanage fcontext -a -e /h

root@servera# man semanage port
... more entries ...
EXAMPLE

       List all port definitions
       # semanage port -l
       Allow Apache to listen on tcp port 81
       # semanage port -a -t http_port_t -p tcp 81
       Allow sshd to listen on tcp port 8991
       # semanage port -a -t ssh_port_t -p tcp 8991
For firewall-cmd, remember to always put the --permanent options. After you are done, don’t forget to run firewall-cmd --reload to load the new configuration.
3.12. Mount user home directory on NFS using autofs
Scenario
- serverb exports its
/nfs_sharedirectory via NFS. Inside the/nfs_sharedirectory, there are two sub-directories:sysadminanddevops. - On servera, automatically mount the directory shared by serverb on the
/remote_nfsdirectory. That is,serverb:/nfs_share/sysadminshould be accessible from/remote_nfs/sysadmin, andserverb:/nfs_share/devopsshould be accessible from/remote_nfs/devops. - Test your configuration using the
sysadminanddevopsuser. The account already exists on servera, with/remote_fs/sysadminand/remote_nfs/devopsset as their home directory respectively. Ensure thatsysadminanddevopscan read from and write to the remote directory.
Solution
Before starting, you might want to verify that the NFS export is working:
root@servera# mount -t nfs serverb:/nfs_share /mnt
root@servera# ls -l /mnt
 ... devops directory info ...
 ... sysadmin directory info ...
We use indirect map to mount both sysadmin and devops using wildcards:
root@servera# dnf install autofs
root@servera# vim /etc/auto.master.d/remote.autofs
/remote_nfs /etc/auto.remote
root@servera# vim /etc/auto.remote
* -rw,sync,fstype=nfs4 serverb.practice-lab.com:/nfs_share/&
root@servera# systemctl enable --now autofs
To verify the configuration, switch into the sysadmin and devops user account:
user@home$ ssh sysadmin@servera
syadmin@servera: Permission denied (...)
It seems that there is something that is still wrong. We can check the logs if we want, but in this case, we basically need to configure SELinux so that we can use NFS home directory.
root@servera# setsebool -P use_nfs_home_dirs true
Verify our configuration:
user@home$ ssh sysadmin@servera
sysadmin@servera$ echo "I can write to the directory" > new_file.txt
sysadmin@servera$ ls -lZd .
** check the permissions of the current directory **
sysadmin@servera$ ls
new_file.txt
user@home$ ssh devops@servera  # this should work too
Remarks
Suppose servera wants to mount a directory shared by serverb under /mount_point. serverb shares directory, directory1, and directory2 from under /share_point. For the purpose of the exam, you only need to remember the following two patterns:
- Using direct map: use
/-on master map and specify the mount point on the mapping file.
root@servera# vim /etc/auto.master.d/direct.autofs
/- /etc/auto.direct
root@servera# vim /etc/auto.direct
/mount_point -rw,sync,type=nfs4 serverb:/share_point/directory
- Using indirect map: specify the mount point on the master map, and use wildcard on the mapping file.
root@servera# vim /etc/auto.master.d/indirect.autofs
/mount_point /etc/auto.indirect
root@servera# vim /etc/auto.indirect
* -rw,sync,type=nfs4 serverb:/share_point/&
You don’t need to remember the syntax for SELinux boolean. Similar to other SELinux commands, the examples can be found on the manual page.
3.13. Run Containers
Scenario:
- Configure the docker/podman registry to pull images from http://registry.practice-lab.com. To login to the registry, you can use admin:password123.
- Create a container image named
img1from a Containerfile hosted on http://materials.practice-lab.com/files/Containerfile. Do not change the content of the Containerfile. - Using the
img1image, run a container calledmy_app. The container should run as a system service, which is started automatically when the system boots. Map the/home/containermgr/databasedirectory on the host to the/root/filesdirectory on the container. The container should be able to read and write from/to the directory. - Use the
containermgruser to perform these tasks.
Solution
The first thing we need to do is to install podman and configure the registry on our machine. In Red Hat, we can use the dnf package manager to get our container tools.
containermgr@servera$ sudo dnf install container-tools
After that, we need to configure and login to the registry.
containermgr@servera$ mkdir -p .config/containers
containermgr@servera$ cp /etc/containers/registries.conf .config/containers/
containermgr@servera$ vim .config/containers/registries.conf
unqualified-search-registries = ['registry.practice-lab.com']
[[registry]]
location = 'registry.practice-lab.com'
insecure = true
blocked = false
After we have setup the registry, we can proceed to login:
containermgr@servera$ podman login registry.practice-lab.com
Username: admin
Password: password123
Login Succeeded!
Download the Containerfile and build the img1 image.
containermgr@servera$ mkdir app; cd app
containermgr@servera$ wget http://materials.lab.com/files/Containerfile
containermgr@servera$ podman build -t img1 .
containermgr@servera$ podman images
*** you should see the localhost/img1:latest image here **
After you’ve built the image, try to run it:
containermgr@servera$ mkdir /home/containermgr/database
containermgr@servera$ chmod a+rw /home/containermgr/database
containermgr@servera$ ls -ld /home/containermgr/database
** ensure that the permissions and ownership is correct **
containermgr@servera$ podman run -d -n my_app -v /home/containermgr/database:/root/files:Z img1
containermgr@servera$ podman ps
** you should see my_app container is up and running **
Verify that the directory is set up properly
containermgr@servera$ podman exec -it my_app /bin/sh
sh$ cd /root/files
sh$ echo "I can write" > new_file.txt
sh$ ls
new_file.txt
sh$ exit
containermgr@servera$ ls /home/containermgr/database
new_file.txt
Create the systemd user directory and generate the service unit file there:
containermgr@servera$ mkdir -p ~/.config/systemd/user
containermgr@servera$ cd ~/.config/systemd/user
containermgr@servera$ podman generate systemd --name my_app --new --files
Stop the current running container, and enable the container-my_app service:
containermgr@servera$ podman stop my_app
containermgr@servera$ systemctl --user daemon-reload
containermgr@servera$ systemctl --user enable --now container-my_app.service
containermgr@servera$ loginctl enable-linger
Remarks
There are lots of thing you need to remember in the container section. However, if you understand the technology itself (you know what a container image is, you know what’s the difference between an image and a container), it should be quite straightforward.
When setting up a storage for the container, always make sure the owner and permission is properly set. The easiest way is to chown the directory to the user running the container, and give rwx permission to the directory. Also remember to use the Z option to share the SELinux context.
Running the container as a system service is another big topic. To find the documentation, you should go to the man page of podman-generate. The documentation is quite comprehensive and it comes with examples (including where to put the service unit file and loginctl enable-linger).
I don’t cover it here, you might be tested to setup network resources for your containers. Simply refer the man page of podman-network and you should be good. To run a container on a particular network, simply use the --network NETWORK_NAME flag of podman run. To configure port mapping, use the -p option.
Classic example: running mysql container. The environment variables are set using -e flag, the persistent storage is set using -v flag, the port mapping is specified using the -p flag, and the network is specified using the --network flag.
user@host$ podman run -d --name db01 \
-e MYSQL_USER=student \
-e MYSQL_PASSWORD=student \
-e MYSQL_DATABASE=dev_data \
-e MYSQL_ROOT_PASSWORD=redhat \
-v /home/user/db_data:/var/lib/mysql:Z \
-p 13306:3306 \
--network db_net \
registry.lab.example.com/rhel8/mariadb-105
4. My Experience + Non-technical Tips & Tricks
Tips #1: Make sure to read the instructions properly and verify your configuration when you are done. I failed my first attempt because I misconfigured the network setting and got 0 for the entire network part. Also, I misread some of the instructions and did the wrong thing (e.g. listed the files instead of copying the files found using find).
To check your configuration, you can simply eyeball the configuration files, or use builtin commands. For instance, you should use ip a, ip route, and cat /etc/resolv.conf to ensure that your IP address, gateway, and DNS server is configured properly. When dealing with LVM, vgdisplay and lvdisplay are your buddies. You should also ensure that your configuration work even after reboot. Make sure that your webserver, autofs, and containers are still running after you reboot your system.
Tips #2: I recommend you resizing your tabs such that your instruction screen and your VM console are visible in one screen. This is so that you can easily navigate between them by clicking on the tab directly. The exam environment was a bit laggy and hard to navigate (Alt+Tab doesn’t work). At first, I need to go to the “Activity” tab on the top left to see all the tabs, and select the correct one.
Still on accessibility, you might want to store all the relevant information (root password, URL of the yum repo, URL of the container registry) on a text file on one of the hosts so that you can easily retrieve them without having to go to the very first instruction page.
Tips #3: Know how to read and find information on the go instead of memorizing everything. As you can see in various scenarios I covered above, I repeatedly used the apropos command, together with SEE ALSO and EXAMPLES section of the man pages. You might also want to remember the default configuration files which contains the syntax you might need (e.g. the default /etc/crontab file contains the syntax of cron jobs; I find it faster to read that file instead of reading through the man page of cron).
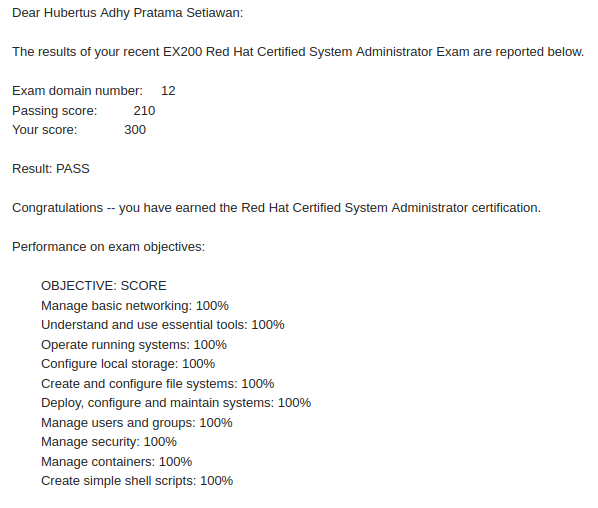
Once you are familiar with the tasks and the environment, the test is very doable. I finally passed my exam on my second try with perfect marks :)
EOF
Hope this post can help you in preparing your RHCSA examination! Till next time!